Check Availability Form
We're Here to Help
MyPrimus
Getting Started
Register to MyPrimus
Overview
MyPrimus gives you access to all your Primus services and accounts online, and is accessible from your computer, tablet or smartphone:
- Access your Primus account 24 hours a day, 7 days a week
- Track the progress of your recent order
- View your account balance and make a payment
- Set up and manage your pre-authorized payment details
- View your billing history
- Sign-up for e-Billing to receive your monthly invoices by email
- Manage your account profile
- Access your webmail
- And more
To Register
- Go to MyPrimus.
- Click Create one now

- Review and accept the Terms of Use.
- Enter your account number, billing postal code and the contact email address we have on file and click Continue.

- Enter and confirm your new password. Click Continue.

- Your registration is now complete. Click on Log In to MyPrimus.

Access MyPrimus
Benefits of using MyPrimus.
MyPrimus gives you access to all your Primus services and accounts online, and is accessible from your computer, tablet or smartphone:
- Access your Primus account 24 hours a day, 7 days a week
- Track the progress of your recent order
- View your account balance and make a payment
- Set up and manage your pre-authorized payment details
- View your billing history
- Sign-up for e-Billing to receive your monthly invoices by email
- Manage your account profile
- Access your webmail
- And more
- Enter the email address you used to register to MyPrimus.
- Type in your password.
- Check the Remember me box.
- Click Log in.
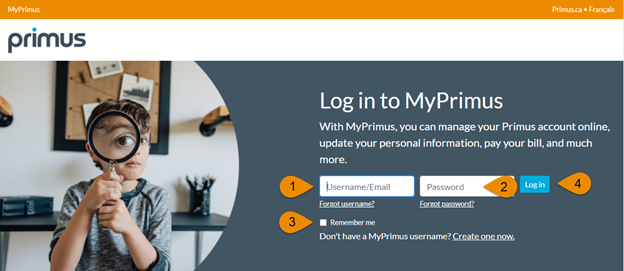
- You will be brought to your account summary page, where you will see your account summary information, current balance activity and any recent orders in progress.

- Log in to MyPrimus.
- Click the MyProfile icon from the upper right hand side, then select Edit User Settings to manage your profile user settings.

- Enter the account number.
- Enter the billing Postal Code registered to the account number.
- Enter a Nickname to help identify the account.
- Click Validate Account Info.
- Edit an account nickname or change primary account setting.
- Click Save.

- If the account you want to remove is currently set as the primary account, you will need to select a new account to set as primary.
- Check the Set as primary box.
- Click Save.
- Return to the account you want to remove.
- Click the Remove button.

- Enter your new email address.
- Click Save Changes.
- Enter a new password and then confirm it.
- Click Save Changes.

- Log in to MyPrimus.
- Select Support from the top menu options, then Create Support Ticket.

- If you have more than one account registered to MyPrimus, select the account you wish to use from the drop down menu to create a support ticket.
- Fill out each field.
- Depending on the service selected, additional fields may appear to be filled out to ensure proper troubleshooting details are captured.
- Under Describe your service issue, enter as much detail as possible.
- Click Submit Ticket.

- Once your ticket is submitted, you can monitor or update it as needed under Support then View Existing Tickets.

Not registered yet? Visit our How to Register for MyPrimus page to find out more.
Log in to MyPrimus
To access MyPrimus, click here . For quick access, we recommend you bookmark this page in your Internet browser.
Manage Account Profile
The MyProfile section lets you manage your user settings, such as linking a second Primus account, change password or contact email address and edit your security questions.
Edit MyPrimus Profile
This option allows you the flexibility to manage all your Primus accounts under the same MyPrimus profile.
If you have more than one account, click on the Add/Edit next to My Accounts

To add a new account:

To edit an existing account:
To remove an existing account:
Change your contact Email and Password;
Click on Edit next to Login Credentials.
Scroll down to change your password.
Create a Support Ticket
If you are experiencing technical difficulties with your service, you can use the below form to report it to us. We will respond to your support request as quickly as possible.